Camping in the snow adds whole new fun and challenges to a normal routine camping trip. Obviously the colder and more serious the winter weather, the more gear you have to pack in. Telemark Skis, Skins, Snow Shoes, crampons, more layers, a thicker sleeping bag, the list goes on and on and before you know it your pack weighs 80 pounds. Well tis the season for snow camping, so I put together some tips to help the novice trying to camp in the snow for the first time or give some new tricks to the wild vet.
1. Prepare for the worst
With trails covered in ice and snow, it’s your job to determine how you are going make it to and from camp alive. Unlike in summer when trails are clearly recognizable, marked with signs, and plenty of people on the trail, winter has zero people on the trail and everything is under multiple feet of snow. Before you even step out the door, you need to do a detailed map study and know multiple prominent terrain features. Understand that even though it looks like a winter wonderland, it can turn into Hell very quickly. This time of year storms can white out the area within minutes and it’s very easy to become disoriented. Thick cloud cover and storms could also potentially throw off a GPS, so having the old map and compass ready could save your life. Don’t be scared to hunker down and wait out a storm. People have survived multiple days building a snow cave.
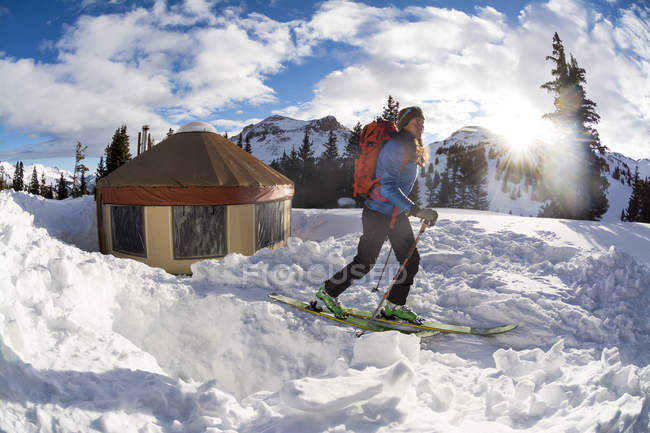
2. Getting to Camp- Skis vs Snow Shoes
Once you are ready to walk through a blizzard backward, determine what method of travel you will use. Of course, we all want to pick the snow mobile, but that’s not an option and we are definitely not post-holing our way to camp. Cross Country Skis/Alpine Touring skis or Telemark skis are the fastest way to get to camp over fairly rough terrain. The back of the heel releases from the binding allowing you to walk in a sliding motion to ascend a mountain. With skins attached to the bottom of your ski, you can easily walk once you learn. You simply click the heel into the binding to ski downhill with AT skis. Teles are much harder to ski downhill and require a difficult lunging method. Skis can also be used to hold down a tent or help build a shelter. Although very efficient, skis can be very heavy and difficult to use at first. If ski or binding breaks, it also much harder to fix than a strap on a snowshoe. Ski boots are terrible around camp, so you will need to pack in boots or your feet will freeze. Snowshoes although a much slower way to cover ground, they are the most practical for camping in the snow. Snowshoes can be used by anyone, clip into any boot, have crampon bottoms, are much lighter than skis and you can even make a pair with a little ingenuity. Although I prefer skis and a heavier pack, I recommend going with snowshoes for your first Snow camping trip.
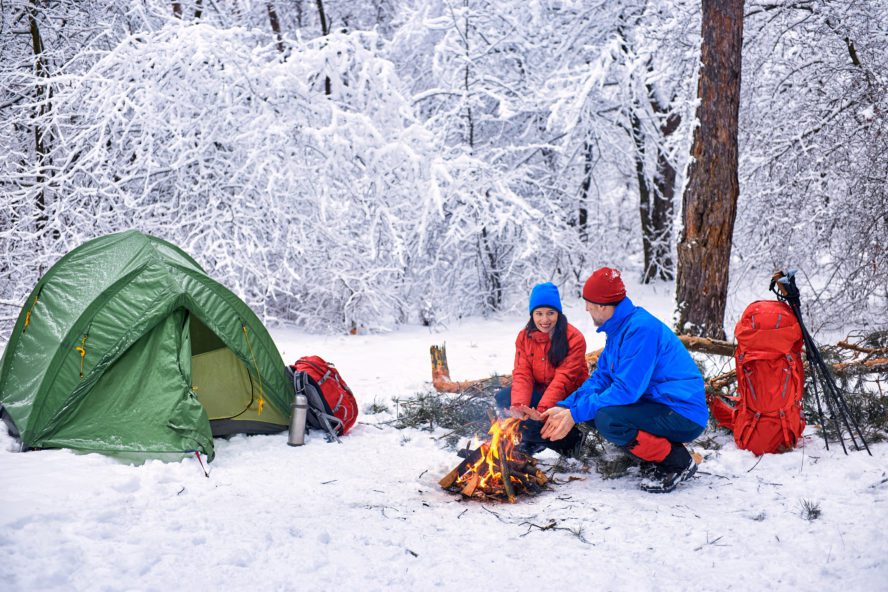
3. Building the Perfect Camp/Shelter- Tent vs Bivy
Now that you have made it to camp, you can’t just whip out the old tent and throw it on the ground like it’s summer. Remember you are standing on multiple feet of snow. You need to pack down the snow or dig it out. This creates a nice solid foundation and usually blocks wind. Use your skis, snowshoes or shovel to pack the snow down enough to where you can jump on it without punching a hole. Or find an area with less snow, such as near the base of a tree and dig out the snow. Never sleep directly on the snow, use a ground pad! During the night the snow under your body will slowly melt and you will sink down. Well if you decided to just throw your tent down and climb in, the floor of your tent could potentially rip out. Your tent will probably decide to rip out from under you at about 2 am. Now all your gear is covered in snow and your freezing cold. Once you have the perfect foundation for a Bivy or Tent, prepare for weather. Gather fire making material just in case, even in places where fires aren’t permitted. Stake down your tent or bury tent lines in the snow. Build a snow fence wall out of rocks or branches for windblown drifting snow. It is a terrible feeling and dangerous to wake up buried alive by snow in your bivy. It’s a mistake I will only make once. From my experience, a tent is very luxurious and it’s nice to be inside when the weather turns nasty, but I usually just roll with the bivy. It helps me cut down on weight and bulk in my bag and it usually makes me build up my campsite a little better.
4. Difficulty with Food and Water
Once camp is all set up, it’s time to sit down to a nice hot meal and refreshing drink of water. Then you open your Nalgene to a block of ice and your Jet Boil won’t light. Well just as your bottled water needs to insulted, so does a Jet Boil canister. Keep the canister near your body while hiking in, and use a small foam ground pad to cook on instead of placing the canister directly on the snow. Place your water bottles upside down in the insulating covers and the bottom will freeze before the top. Then you can take the remaining water to reheat the frozen water or use it to melt snow. You must have a small amount of water to melt snow. If you try to melt snow directly in a cooking stove it will just burn the snow. You can also add Gatorade or lemonade packets to your water to lower the waters freezing temperature. Also, bring a lighter to light your Jet Boil, the ignitor on the Jet Boil seems to have the biggest problems. Jet Boil claims they work up to 26,000 feet. I’ve successfully used mine at 14,000 feet and it took about 4-5 minutes to boil water. If you decide to bring a mountain house, use the small pro-paks, they won’t expand at altitude. Also never eat snow if you are thirsty. It will only cause you to drop your core temperature and cause your body to work harder to warm you up, thus creating you to become more Dehydrated!
5. Take Care of Your Gear and Your Gear will Take Care of You
It is very important to stop a problem before it even starts while camping in the snow or below-freezing temperatures. In summer it’s fine if your gear gets soaked by rain, but in winter wet gear can kill you. Down loses its insulating properties as it gets wet. Use a strong bristle brush to clean off any snow from your boots, outer layers of clothing, tent, etc. Snow will just keep accumulating like dirt if you don’t keep cleaning it off, and then all your gear ends up wet. Use vapor barriers for your sleeping bag and boots. Using vapor barrier socks can keep your feet from sweating into your boots because the sweat will cause your boots to freeze by the morning. A vapor barrier for your sleeping bag can keep condensation from building up in your bag, and although I’ve never experienced it, potentially turn your sleeping bag into a frozen rock. Weather permitting turns your sleeping bag inside out every day and allow it to dry in the sun on top of your tent or from a tree limb. Get a black sleeping bag and it will soak up the heat very quickly. Change all your sweaty gear each night, especially your socks, gloves, and beanie. Keeping all your gear as clean as possible and free of moisture will allow it to work efficiently.
6. Block the Sun and Wind
Even though it is 10 degrees below, you still need to protect yourself from the sun more than in the summer. In the snow, you are being hit by sun rays from every direction due to the snow reflecting the rays. Always wear sunglasses or Goggles or you literally could go blind. Apply sunscreen in places you wouldn’t normally think such as under your chin or under your nose. It is extremely painful when the skin under your nose becomes dry, cracked, wind/sunburned and you keep rubbing it with your glove cause your nose is running. Every day, throughout the day, you should apply lotion to your hands, face, and feet to keep them from drying and cracking. Apply copious amounts of lip balm and wear wind-protective gear such as balaclavas. Vaseline can also be used to trap heat or act as a wind barrier.
7. Keep the Snow Out
While you hike around all day in the snow, the snow will try to find its way into your boots, gloves, neck area, etc. Keeping the snow out will prevent unnecessary damp socks, glove liners or thermals. Wear pants with an elastic bottom that also have a cord to keep them down around your boots. Place snow Gaiters over top and you will prevent any snow from getting inside your boots. Make sure your outer layer glove also has a draw string to prevent snow from getting inside your glove while you work around camp. A neck gaiter and hood should prevent snow from entering around your neck. Stay dry to stay warm.
8. Pee before Bed and Have a Pee Bottle
This tip may seem ridiculous, but there is nothing more annoying than being completely bundled up and cozy in your sleeping bag and then you have to pee in the middle of the night. Not only will you lose the heat you built up in your sleeping bag, but you have to put on boots to go outside. It’s not the warm summer months, where you can quickly tip toe bare foot to a tree. Now it’s snowing with a steady wind outside and you have to put on boots, snow shoes, gloves, etc just to pee. So having a distinct bottle in your sleeping bag to pee in is a life saver. Ladies I’m sorry, but you may still have to leave the tent unless you have some incredible aim.
Camping in the snow is a wild and liberating experience. I hope these tips help you go camping more during this time of year! Feel free to share any tips or tricks you use while camping in the snow, I’d love to learn them. For more tips for staying warm this winter season check out my 5 tips to staying warm while camping in winter weather.
Contributed by: HappierCamping.com – Extreme adventurers and outdoor enthusiasts

- Best Camping Sites In India - May 28, 2023
- 10 Essential Items For A Comfortable Camping Trip - May 4, 2023
- The Best Camping Tents For Families - May 4, 2023